

How NAT works on an ESP32: Wi-Fi routing and repeater
NAPT does not work in Arduino Core: its lwIP lacks IP_FORWARD. Learn the ESP-IDF sdkconfig, DNS propagation through DHCP and a measured repeater running in practice.
Hardware requirements:
- Placa ESP32-S3 (referência: módulo N16R8)
- Cabo USB-C com transmissão de dados
- Windows 10 ou 11 com acesso à internet
- Roteador Wi-Fi 2,4 GHz e um celular para testar
Download this tutorial's materials:
- Projeto completo (ZIP)94 KBFirmware ESP-IDF, sdkconfig com as opções de NAPT, tabela de partições, definição da placa N16R8, README e o manual em PDF.
- Manual em PDF (7 páginas)101 KBPasso a passo em nove etapas, tabela de solução de problemas e checklist final com as medições de referência.
Want to receive new manuals and industrial schematics? Join our channel on Telegram / WhatsApp
What NAT is on an ESP32 — and what it is not
NAT is what lets several devices on a private network reach the internet through a single address. On an ESP32, the variant used is NAPT, which translates the address and the port at the same time — this is what turns the board into a real Wi-Fi repeater rather than an isolated access point.
The idea is simple. The ESP32 brings up both interfaces at once: STA connects to your router, while AP creates its own network with a DHCP server. The NAPT engine rewrites the headers of packets coming from AP clients and forwards them through STA, keeping a table of where each response must go.
What almost every tutorial forgets to say is that this does not compile in the Arduino Core. The next section explains why, and the rest of this article shows the path that works.
Why the Arduino Core does not do NAT
You will find examples using ip_napt_enable and ip_portmap_init, including lwip/napt.h directly in an Arduino sketch. That code does not work in current Arduino Core builds for the ESP32-S3, for three concrete reasons:
The CONFIG_LWIP_IP_FORWARD option is disabled in Arduino's precompiled sdkconfig. Without IP forwarding, the client's packet reaches the board and dies there.
The distributed liblwip.a does not expose the ip_napt_enable symbol. Depending on the version, linking fails or the code compiles against a stub that does nothing.
And because Arduino's sdkconfig is already compiled, the option cannot be enabled afterward. It must be active when lwIP itself is compiled.
The practical result is harsh: in some versions the sketch compiles, boots, prints a success message, and the client connected to the AP simply cannot browse. There is no error left to investigate.
The correct path is ESP-IDF firmware with its own sdkconfig. That is what this article uses.
The four sdkconfig options that enable NAPT
Put these in your sdkconfig.defaults file before compiling:
| 1 | CONFIG_LWIP_IP_FORWARD=y |
| 2 | CONFIG_LWIP_IPV4_NAPT=y |
| 3 | CONFIG_LWIP_IPV4_NAPT_PORTMAP=y |
| 4 | CONFIG_LWIP_L2_TO_L3_COPY=y |
IP_FORWARD enables forwarding between interfaces. IPV4_NAPT enables address-and-port translation. NAPT_PORTMAP enables port mapping, which is needed if you want to expose an internal service. L2_TO_L3_COPY copies the layer-2 packet to layer 3 before routing; without it, forwarding between AP and STA behaves erratically.
After changing these settings, delete the build folder and compile from scratch. Changing sdkconfig without cleaning is a classic source of inexplicable behavior.
esp_netif_napt_enable — the API you should use
Forget raw lwIP ip_napt_enable. Modern ESP-IDF exposes a higher-level API that receives the interface handle and takes care of the details:
| 1 | static void enable_nat(void) |
| 2 | { |
| 3 | if (!ap_netif) { |
| 4 | nat_result = ESP_ERR_INVALID_STATE; |
| 5 | nat_enabled = false; |
| 6 | return; |
| 7 | } |
| 8 | if (sta_netif) { |
| 9 | esp_netif_napt_disable(sta_netif); |
| 10 | } |
| 11 | nat_result = esp_netif_napt_enable(ap_netif); |
| 12 | nat_enabled = nat_result == ESP_OK; |
| 13 | ESP_LOGI(TAG, "NAPT enable on AP: %s", esp_err_to_name(nat_result)); |
| 14 | } |
Two details matter. NAPT is enabled on the AP interface, where the traffic to be translated comes from, not on STA. It is also worth explicitly disabling it on STA first: if NAPT remains active on the other side, routing becomes ambiguous.
Store the return value instead of discarding it. It is the difference between “I thought it was enabled” and “it was enabled”.
DNS is the half nobody talks about
Here is the real reason most ESP32 repeater attempts “do not work”.
With NAPT active, the client connects, receives an IP from DHCP and routing works. Even so, the browser opens nothing. The person concludes that NAT failed — when in fact nobody delivered a DNS server to the client. Without name resolution, the internet looks dead even when packets are being routed perfectly.
The AP's DHCP server must offer DNS, and that option is accepted only while the server is stopped. The correct sequence is stop, configure, start:
| 1 | static void sync_dns_to_ap(void) |
| 2 | { |
| 3 | esp_netif_dns_info_t dns = {0}; |
| 4 | if (esp_netif_get_dns_info(sta_netif, ESP_NETIF_DNS_MAIN, &dns) == ESP_OK) { |
| 5 | if (dns.ip.u_addr.ip4.addr == 0) { |
| 6 | ESP_LOGW(TAG, "Router DNS was empty, using 8.8.8.8"); |
| 7 | esp_netif_str_to_ip4("8.8.8.8", &dns.ip.u_addr.ip4); |
| 8 | dns.ip.type = ESP_IPADDR_TYPE_V4; |
| 9 | } |
| 10 | esp_netif_set_dns_info(ap_netif, ESP_NETIF_DNS_MAIN, &dns); |
| 11 | esp_netif_dhcps_stop(ap_netif); |
| 12 | uint8_t offer_router = 1; |
| 13 | uint8_t offer_dns = 1; |
| 14 | esp_netif_dhcps_option(ap_netif, ESP_NETIF_OP_SET, |
| 15 | ESP_NETIF_ROUTER_SOLICITATION_ADDRESS, |
| 16 | &offer_router, sizeof(offer_router)); |
| 17 | esp_netif_dhcps_option(ap_netif, ESP_NETIF_OP_SET, |
| 18 | ESP_NETIF_DOMAIN_NAME_SERVER, |
| 19 | &offer_dns, sizeof(offer_dns)); |
| 20 | esp_netif_dhcps_start(ap_netif); |
| 21 | } |
| 22 | } |
DNS is read from the STA interface — in other words, it is the same DNS your router gave to the ESP32. When it comes back empty, which happens with some providers, the code falls back to 8.8.8.8 instead of leaving the client without resolution.
Both offer flags must be enabled explicitly. ESP_NETIF_DOMAIN_NAME_SERVER makes DHCP announce DNS, while ESP_NETIF_ROUTER_SOLICITATION_ADDRESS makes it announce the gateway. Without the second one, the client receives an IP and DNS but does not know where to send outbound traffic.
Call this function after STA has obtained an IP, not before: the router's DNS exists only from that point onward.
How to know that it really worked
Do not trust the boot log. Expose the state through an HTTP endpoint and read it while the repeater is running. This is the real response from an ESP32-S3 N16R8 acting as a repeater, with the fields that matter:
| 1 | { |
| 2 | "network_mode": "nat", |
| 3 | "ap_ssid": "MeuRepetidor-01", |
| 4 | "ap_ip": "192.168.4.1", |
| 5 | "ap_dhcp_start": "192.168.4.2", |
| 6 | "ap_dhcp_end": "192.168.4.20", |
| 7 | "ap_clients": 1, |
| 8 | "dns": "192.168.15.1", |
| 9 | "dhcp_status": "router:ESP_OK dns:ESP_OK start:ESP_OK", |
| 10 | "nat_enabled": true, |
| 11 | "nat_result": "ESP_OK", |
| 12 | "nat_interface": "ap", |
| 13 | "upstream_http_1_1_1_1": 301, |
| 14 | "upstream_http_neverssl": -1, |
| 15 | "rssi": -39, |
| 16 | "free_heap": 8600128, |
| 17 | "uptime_ms": 13687494 |
| 18 | } |
The nat_result field set to ESP_OK together with nat_interface set to ap confirms that NAPT came up in the right place. dhcp_status shows the three operations from the previous section, and all three must be ESP_OK — if the middle one fails, the client has no DNS. dns should show your router's address; if it shows 8.8.8.8, the fallback was used and it is worth investigating why.
Diagnosis: raw IP versus name
This is the test that separates the two most commonly confused problems, and it fits in two requests.
Probe a literal IP address and a hostname, both over plain HTTP, never HTTPS — TLS adds a failure layer that gets in the way of diagnosis:
| 1 | static void run_upstream_diagnostics(void) |
| 2 | { |
| 3 | upstream_http_1_1_1_1 = http_probe("http://1.1.1.1", |
| 4 | upstream_error_1_1_1_1, |
| 5 | sizeof(upstream_error_1_1_1_1)); |
| 6 | upstream_http_neverssl = http_probe("http://neverssl.com", |
| 7 | upstream_error_neverssl, |
| 8 | sizeof(upstream_error_neverssl)); |
| 9 | } |
The result is easy to read. If the raw IP responds and the name fails, routing is good and the problem is name resolution. If both fail, the problem is routing or the upstream link. If both respond, the whole path is working.
One subtlety costs hours: the ESP32's own resolver and the DNS delivered to clients are different paths. The client asks the server announced by DHCP, and that query crosses NAPT like any other packet. The probe above, on the other hand, uses the board's internal stack.
This is not theory. On the device measured for this article, the hostname probe failed with ESP_ERR_HTTP_CONNECT while the raw-IP probe responded normally — and at the same time, the phone connected to the AP resolved domains and browsed without any problem, as confirmed by the public-IP test below.
In other words, the repeater was fully working for clients while the board's own self-diagnosis reported a DNS failure. If you encounter this scenario, investigate the firmware's internal resolver, not NAT. And be suspicious of the dashboard: a diagnosis that measures only a raw IP will show everything as healthy while the user cannot open a website.
It is also worth running this diagnosis periodically, not only when STA obtains an IP. A value measured at boot and displayed hours later as if it were current is worse than displaying nothing.
Measurements from a real repeater
The numbers below come from an ESP32-S3 N16R8 running the firmware described here, monitored by polling every ten seconds.
NAPT came up with nat_result set to ESP_OK on the AP interface, and DHCP propagated DNS with all three operations returning ESP_OK, delivering the local router's address instead of the fallback.
An Android phone connected to the AP and the ap_clients counter went from 0 to 1, remaining stable through eight minutes of continuous readings without reassociation.
How to prove routing without asking anyone to trust you
An associated client is not necessarily a browsing client, and opening the portal at 192.168.4.1 proves nothing either: that address belongs to the ESP32 itself, so traffic does not cross the translation. Saying “I turned off mobile data, trust me” is not evidence.
There is an objective test, and it fits in a single screenshot: compare the public IP seen by the client with the IP of your link.
First find your network's public IPv4 address from any wired machine:
| 1 | curl -4 https://api.ipify.org |
Then, on the phone connected to the ESP32 AP, open api.ipify.org in the browser. If the displayed address is the same as your link's address, traffic left through your broadband connection — it crossed the repeater. If it is different, the phone escaped through the mobile network and the test is invalid.
The elegance of the method is that it does not depend on a declared configuration. The displayed IP identifies by itself which path the packet used. Since you type a domain name instead of an IP, the same screenshot proves three things at once: DNS resolved, TCP went out and came back, and the route used your link.
In this article's test, the phone displayed the same IPv4 address as the home link, with ap_clients at 1 in twenty consecutive readings covering the moment of capture, with no zero readings in the interval. The repeater was validated end to end.
One detail can confuse you: ESP32 NAPT is IPv4 only. If the displayed address is in IPv6 format, beginning with something like 2804, the phone used native IPv6 and did not use NAT. Force the test over IPv4.
The most interesting detail appeared in memory. The lowest recorded free heap fell from 8,590,580 to 8,527,300 bytes after the client connected, a difference of about 63 KB. That drop is the NAPT table and connection tracking being allocated: it is the signature of traffic actually crossing the translation, rather than merely a client associated without sending traffic.
The device had accumulated 3 hours and 48 minutes of continuous operation, with a −39 dBm signal on channel 11. Notice that the 8.6 MB of free heap exists only because octal PSRAM is enabled: the ESP32-S3 has about 320 KB of internal RAM, and without PSRAM the NAPT table competes with the rest of the firmware for much tighter space.
Tutorial: from an empty computer to a working repeater
From here on, this is a step-by-step guide without skipping stages. The starting point is a Windows computer with nothing installed and an ESP32-S3 board in the box. The destination is a phone browsing through it.
Allow 40 to 60 minutes the first time. Most of that is downloading: ESP-IDF downloads the complete Xtensa compiler.
Step 1: install ESP-IDF
Arduino is not suitable here, as explained in the second section. Download the official ESP-IDF installer for Windows from Espressif and choose version 5.x or newer.
During installation, accept the default path and leave the shortcut option enabled. The installer downloads Python, Git and the compiler toolchain — it is normal for this to take a while.
When it finishes, look in the Start menu for ESP-IDF PowerShell. This shortcut opens a terminal with all environment variables configured. Always use it instead of ordinary PowerShell: outside it, the idf.py command does not exist.
Confirm that it works:
| 1 | idf.py --version |
Step 2: create the project
Still in ESP-IDF PowerShell, go to the folder where you keep projects and generate the skeleton:
| 1 | cd C:\projetos |
| 2 | idf.py create-project esp32-repetidor |
| 3 | cd esp32-repetidor |
This creates the minimum structure, with a main folder and CMakeLists.txt. Put the repeater code in the main file inside that folder, using the functions shown in the preceding sections.
Step 3: write sdkconfig.defaults
This step determines whether NAT will exist at all. Create a file named sdkconfig.defaults at the project root, beside CMakeLists.txt, with the content below. The first four lines enable NAPT; the others enable octal PSRAM and the 16 MB flash on an N16R8 board:
| 1 | CONFIG_LWIP_IP_FORWARD=y |
| 2 | CONFIG_LWIP_IPV4_NAPT=y |
| 3 | CONFIG_LWIP_IPV4_NAPT_PORTMAP=y |
| 4 | CONFIG_LWIP_L2_TO_L3_COPY=y |
| 5 | CONFIG_ESPTOOLPY_FLASHSIZE_16MB=y |
| 6 | CONFIG_SPIRAM=y |
| 7 | CONFIG_SPIRAM_MODE_OCT=y |
| 8 | CONFIG_SPIRAM_SPEED_80M=y |
| 9 | CONFIG_SPIRAM_USE_MALLOC=y |
If your board has no PSRAM, remove the four SPIRAM lines. If the flash is 8 MB, change the FLASHSIZE value. The first four lines never change.
Step 4: choose the target and compile
Tell ESP-IDF which chip you are using. This command must come before the first build because it creates sdkconfig from sdkconfig.defaults:
| 1 | idf.py set-target esp32s3 |
| 2 | idf.py build |
The first build takes longer because it compiles ESP-IDF as well. Later builds take seconds.
If you edit sdkconfig.defaults afterward, delete the build folder and run set-target again. Changing the options without cleaning is the most common cause of “I changed the configuration and nothing happened”.
Step 5: find the port and flash
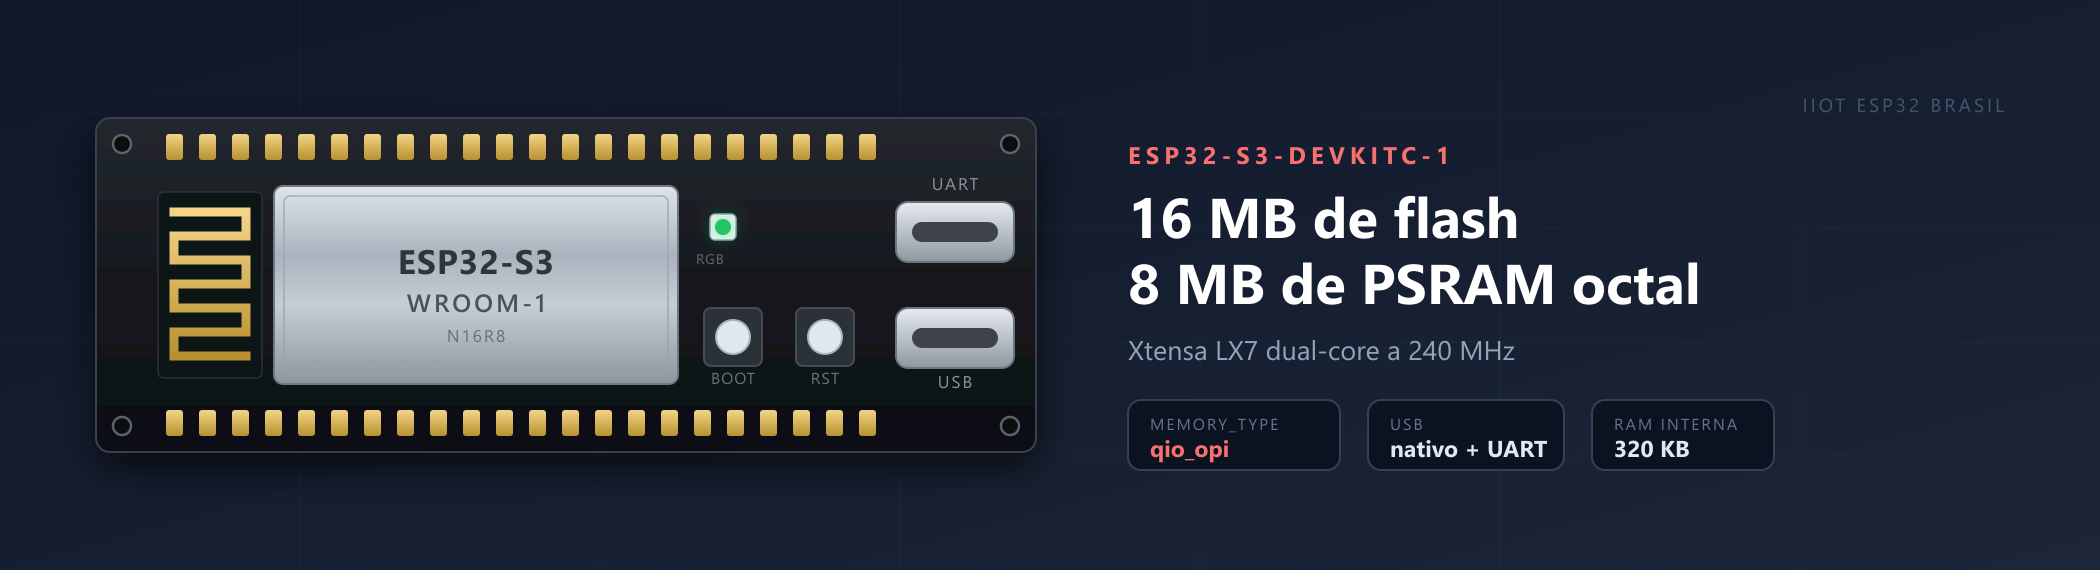
Connect the board with the USB cable. On an ESP32-S3 with two ports, use the one marked UART.
To find which COM port appeared:
| 1 | idf.py -p COM3 flash |
Replace COM3 with the number shown in Windows Device Manager under Ports. If flashing fails with a connection error, hold the board's BOOT button, tap RESET, release BOOT and run the command again.
Step 6: watch the serial monitor
With the board still connected, open the monitor:
| 1 | idf.py -p COM3 monitor |
You should see the boot log and, soon after the board starts, the NAPT line. It is the first confirmation that it worked:
| 1 | I (2841) AnalictY-NAT: NAPT enable on AP: ESP_OK |
If anything other than ESP_OK appears, return to step 3: the sdkconfig options were not applied. To leave the monitor, use Ctrl plus the right bracket.
Step 7: provide your network credentials
The board is now running, but it still does not know your network password. Here is a time-saving warning: the NAT firmware portal is a status panel, not a form. It shows repeater state and offers update and restart, but it has no SSID field or network-scan button.
That is a design decision, not a limitation. Scanning networks requires putting the radio into scan mode, which briefly interrupts both interfaces and destabilizes the routing the repeater must keep alive. That is why provisioning with network discovery lives in a separate firmware, documented in the Wi-Fi configuration portal tutorial — the natural companion to this one: one configures, the other routes.
To provide the network to this board, send the credentials directly to the configuration endpoint from a computer on the same network or connected to the board's access point:
| 1 | curl -X POST http://192.168.4.1/api/config -H "Content-Type: application/json" -d "{\"wifi_ssid\":\"MinhaRede-2.4G\",\"wifi_pass\":\"minha-senha\"}" |
The credentials are stored in NVS and survive a restart and a new firmware flash.
One more time-saving detail: the ESP32-S3 does not connect to 5 GHz networks. If your network has a 5G suffix, use its 2.4 GHz network.
Step 8: validate the repeater
With the board connected to your network, it obtains an address on your home network. Find it in the serial monitor or in your router's device list, then open that address in the computer's browser.
The panel shows the complete state and is where you confirm what matters:
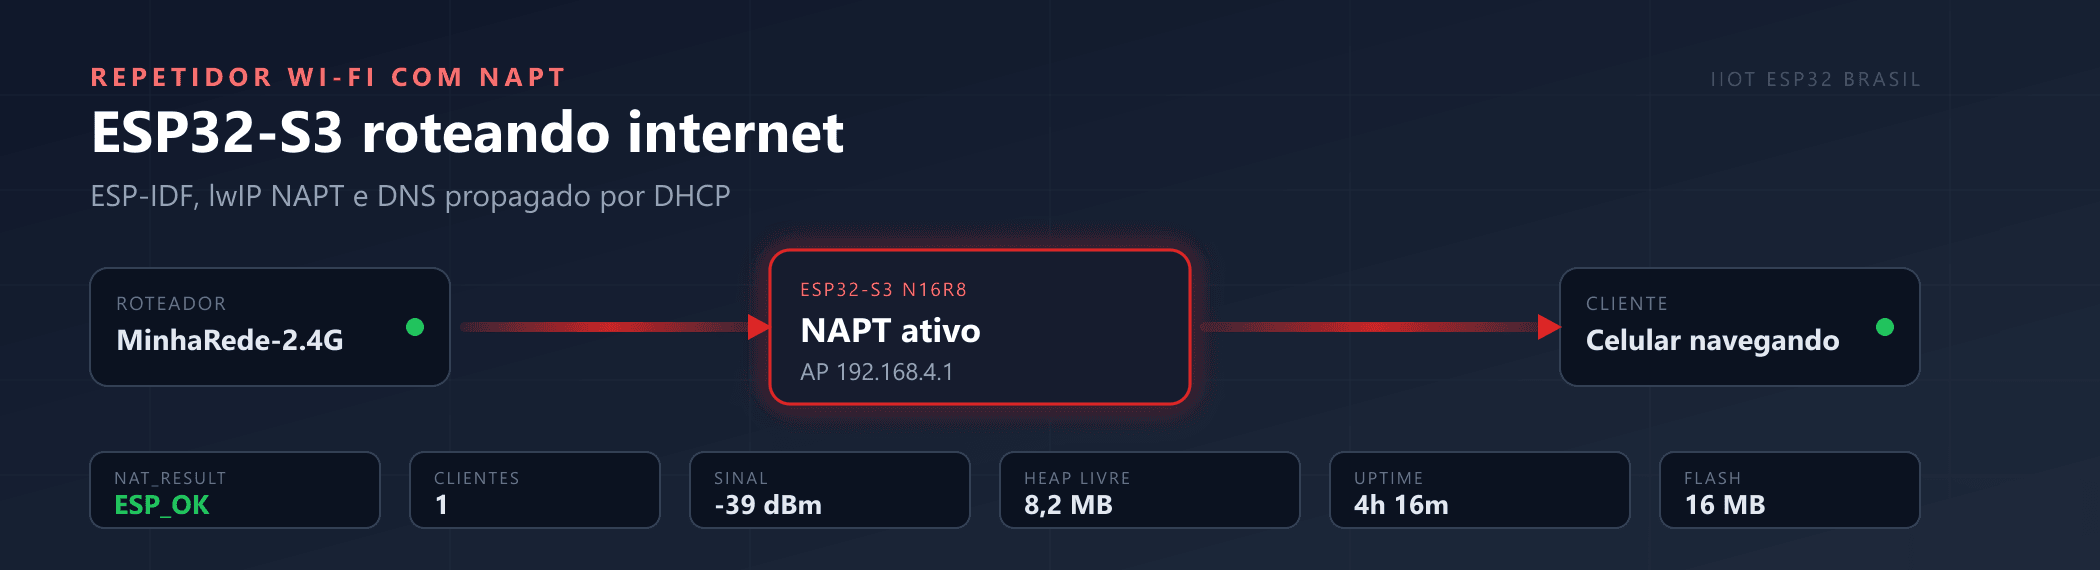
Check three fields before celebrating. nat_result must be ESP_OK. dhcp_status must show all three operations as ESP_OK. dns must contain your router's address.
The final test is the simplest: keep the phone connected to the board's network and open any website. If it loads, the client counter reaches 1 and the repeater is validated end to end.
Common errors and how to solve them
The client connects but cannot browse, and NAPT is ESP_OK. It is DNS. Check dhcp_status: all three operations must be ESP_OK, and the ESP_NETIF_DOMAIN_NAME_SERVER flag must be enabled.
The client receives an IP and DNS but nothing leaves. The gateway is not being announced. Enable ESP_NETIF_ROUTER_SOLICITATION_ADDRESS together with the DNS option.
esp_netif_napt_enable returns an error. The sdkconfig options were not applied. Confirm all four and rebuild after deleting the build folder.
I compiled with Arduino and it does not work. It will not work. Move to ESP-IDF, as explained in the second section.
It works for a few minutes and then degrades. The NAPT table has a finite number of entries. On a chip without PSRAM, a few clients with many simultaneous connections can exhaust the space quickly.
The ESP32 reports a DNS failure but clients can browse. This is expected, as explained in the diagnosis section: they are different paths. Investigate the internal resolver, not NAT.