
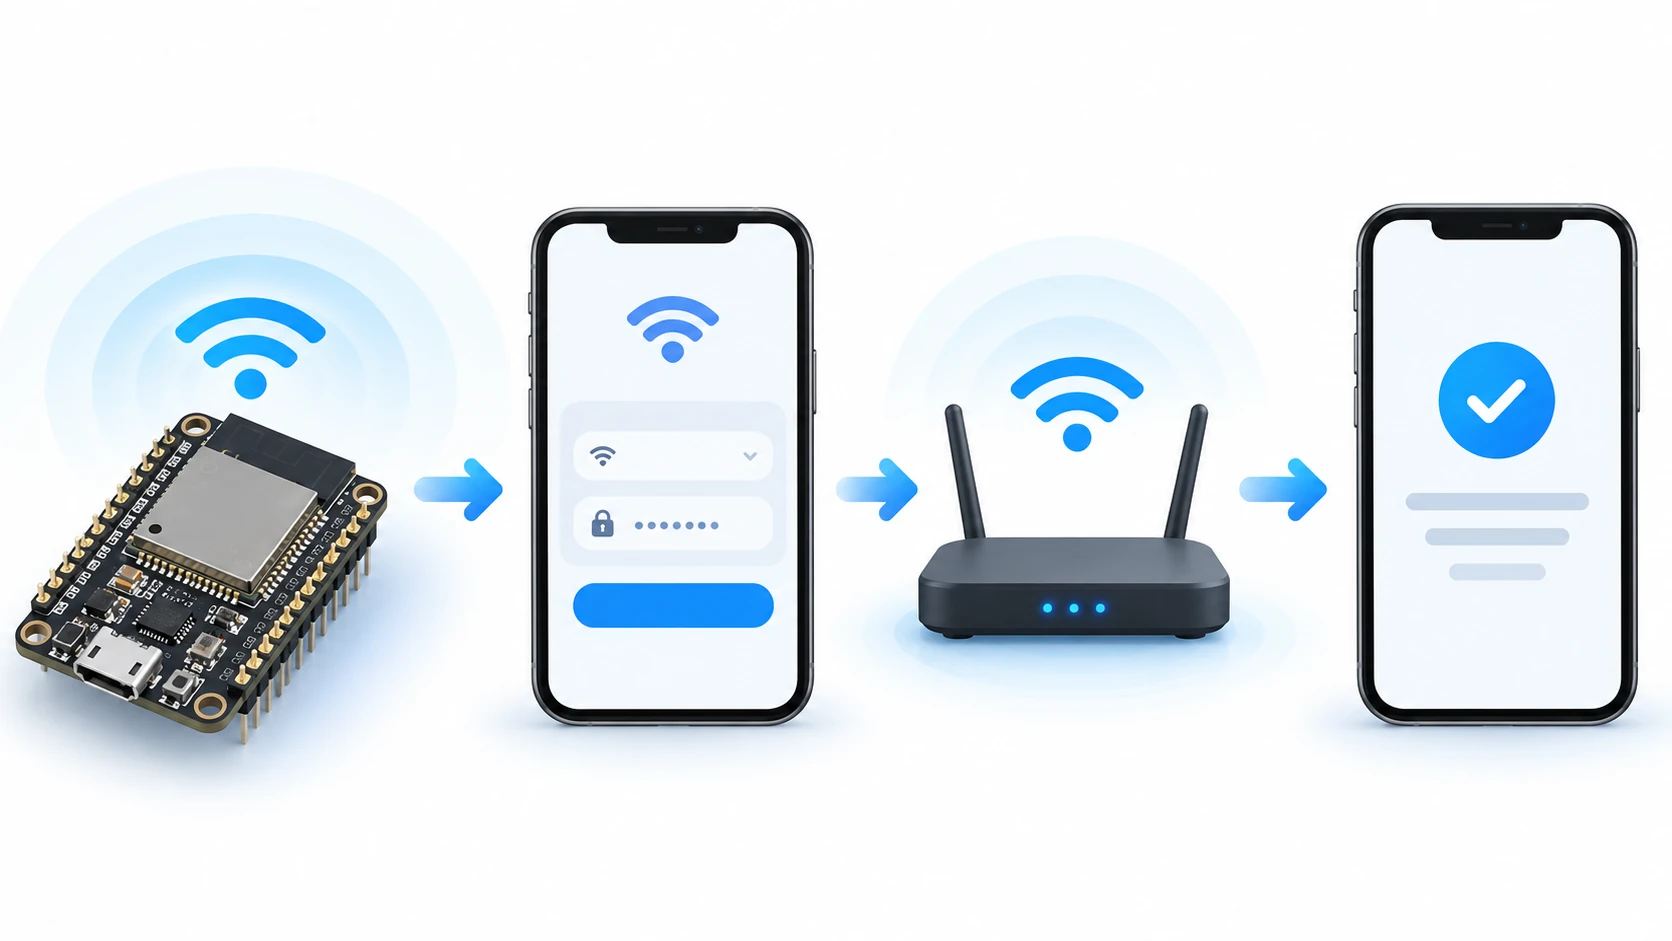
How to create an embedded Wi-Fi portal on the ESP32
A portal that a technician opens on a phone to configure Wi-Fi without a cable: network scanning, NVS storage and a connection test that does not block the HTTP response.
Hardware requirements:
- Placa ESP32 ou ESP32-S3 (referência: módulo N16R8)
- Cabo USB com transmissão de dados
- Um celular para abrir o portal
- Rede Wi-Fi de 2,4 GHz
Download this tutorial's materials:
- Projeto completo (ZIP)153 KBFirmware Arduino com o portal, varredura de redes e gravação na NVS, definição da placa N16R8, modelo de configuração, README e o manual em PDF.
- Manual em PDF (7 páginas)168 KBPasso a passo em oito etapas, o padrão de resposta que evita travar o portal, tabela de solução de problemas e checklist final.
Want to receive new manuals and industrial schematics? Join our channel on Telegram / WhatsApp
The problem the portal solves
After the firmware is flashed, the device still does not know which network to join. Rebuilding with the SSID and password embedded works on the bench and fails in the field: every installation would need a different binary, and the technician would need a notebook with the build environment just to change a password.
The embedded portal reverses that. The board starts its own network, the technician connects a phone to it, opens a page, selects the network and enters the password. The credentials go to non-volatile memory and survive reboot and a new firmware flash. No cable, no compiler.
This tutorial documents the AnalictY firmware portal and complements the NAT tutorial: one configures the device, the other routes its traffic.
Arduino works here, but not for NAT
The choice is worth explaining because it may look inconsistent at first.
The NAT repeater needs ESP-IDF because NAPT depends on lwIP build options that the Arduino Core does not expose. The configuration portal does not use any of that: it needs Wi-Fi access-point mode, an HTTP server and persistent storage. All three are available in Arduino Core, ready and stable.
Using ESP-IDF here would only add complexity without a benefit. Choose the layer according to the requirement, not preference.
Synchronous WebServer, not asynchronous
Many tutorials reach for ESPAsyncWebServer by reflex. This portal uses the WebServer already included in the core:
| 1 | #include <WiFi.h> |
| 2 | #include <WebServer.h> |
| 3 | #include <Preferences.h> |
| 4 | WebServer webServer(80); |
| 5 | Preferences preferences; |
The synchronous server handles one request at a time in the main loop. For a portal that a technician opens for two minutes, that is more than enough — and it avoids an external dependency that often introduces version conflicts on ESP32.
The practical rule: asynchronous code pays off with several simultaneous clients or long-lived connections such as WebSocket. Provisioning is not that case.
Where the HTML lives, and why it is not LittleFS
Another common reflex is to store the page in a file system. This portal embeds the HTML directly in the binary, using the F macro to keep the text in flash instead of RAM:
| 1 | page += F("<div class='api'>Phone on AP: http://192.168.4.1<br>"); |
| 2 | page += F("GET /api/status<br>GET /api/wifi/scan<br>"); |
| 3 | page += F("GET /api/config<br>POST /api/config</div>"); |
The operational advantage is significant: the firmware is one file. There is no separate file-system upload step and no classic risk of flashing new firmware while forgetting to update the interface, leaving an old page serving endpoints that have already changed.
The cost is that changing the interface requires a rebuild. For a configuration page that changes rarely, it is a good trade.
The portal routes
There are nine routes, each with an OPTIONS variant to answer CORS requests when the portal is consumed by another origin:
| 1 | GET / portal page |
| 2 | GET /api/status JSON diagnostics |
| 3 | GET /api/capabilities board capabilities |
| 4 | GET /api/wifi/scan networks found by the scan |
| 5 | GET /api/config current configuration |
| 6 | POST /api/config stores SSID, password and parameters |
| 7 | GET /api/program runtime program |
| 8 | POST /api/program stores the program |
| 9 | GET /api/runtime/status execution state |
| 10 | POST /api/reboot reboots the board |
| 11 | POST /api/reset-config clears the NVS configuration |
Keeping reads and writes as separate methods of the same route makes the API predictable: GET on `/api/config` returns what is stored, while POST on the same route stores it.
The scan that does not give up on the first attempt
ESP32 Wi-Fi scanning often fails when the radio is busy, especially while the access point is active. A scan that returns an error makes the technician conclude that the network does not exist when it is actually there.
That is why the scan tries twice, stopping the previous scan and clearing its result before retrying:
| 1 | int scanWifiNetworks() { |
| 2 | for (int attempt = 0; attempt < 2; attempt++) { |
| 3 | prepareWifiScanMode(); |
| 4 | esp_wifi_scan_stop(); |
| 5 | WiFi.scanDelete(); |
| 6 | delay(attempt == 0 ? 120 : 450); |
| 7 | int count = WiFi.scanNetworks(false, true, false, 650); |
| 8 | if (count >= 0) { |
| 9 | return count; |
| 10 | } |
| 11 | WiFi.scanDelete(); |
| 12 | WiFi.mode(apMode ? WIFI_AP_STA : WIFI_STA); |
| 13 | delay(350); |
| 14 | } |
| 15 | return -1; |
| 16 | } |
The four arguments matter. The first false makes the scan blocking and returns a ready result. The second true includes hidden networks. The third false uses an active scan, which finds more networks than a passive scan. And 650 is the time in milliseconds per channel — below that, distant networks disappear from the result.
The second attempt waits longer than the first, 450 instead of 120 milliseconds, giving the radio time to reorganize before retrying.
The detail that separates a good portal from a bad one
This is the central point of the article.
The temptation is to receive the form, connect to Wi-Fi, and only then answer the browser with the result. Do not do that. If the password is wrong, the ESP32 can spend up to twenty seconds trying, the phone times out, and the page dies without a response. The technician concludes that the value was not saved, enters it again, and hits the same problem.
The correct sequence is to save, answer immediately and test afterwards:
| 1 | void handleConfigPost() { |
| 2 | saveConfigFromRequest(); |
| 3 | lastWifiStatus = WL_IDLE_STATUS; |
| 4 | lastWifiError = "Configuration saved. Wi-Fi test started..."; |
| 5 | wifiConnectTestPending = true; |
| 6 | String body; |
| 7 | body += F("<meta http-equiv='refresh' content='8;url=/'>"); |
| 8 | body += F("<h1>Configuration saved</h1>"); |
| 9 | webServer.send(200, "text/html", body); |
| 10 | } |
The save happens, the response goes out immediately, and the flag is set. The connection test runs in the main loop, outside the request cycle:
| 1 | if (wifiConnectTestPending) { |
| 2 | wifiConnectTestPending = false; |
| 3 | connectWiFiOnce(20000); |
| 4 | } |
The page sent to the technician includes an 8-second meta refresh pointing to the root. Nothing else is required: the screen returns to the portal on its own, now showing whether the connection succeeded or why it failed.
The user experience improves enormously. Saving always confirms immediately. The slow test, which can fail, runs separately.
Diagnostics that tell you what to do
A generic provisioning error is useless. The portal exposes the last state at `/api/status`, with the likely reason already translated:
| 1 | { |
| 2 | "wifi_connected": false, |
| 3 | "wifi_ssid": "MyNetwork-2.4G", |
| 4 | "last_wifi_status": "disconnected", |
| 5 | "last_wifi_error": "Failure: disconnected. Usually a wrong password, WPA3-only, MAC filtering or a router refusal.", |
| 6 | "last_wifi_channel": 6, |
| 7 | "ap_active": true, |
| 8 | "ap_ip": "192.168.4.1" |
| 9 | } |
Notice ap_active remains true after the failure. That is the portal contract: the access point does not go down when the connection fails. If it did, the technician would lose the way back and need a cable — exactly what the portal exists to avoid.
When the connection succeeds, the same endpoint returns the assigned address and signal strength, which helps decide antenna placement in the field.
Tutorial: from zero to phone-configured Wi-Fi
Step 1: prepare the environment
Install VS Code and the PlatformIO IDE extension. If you have never done this, the PlatformIO getting-started tutorial covers the installation in detail.
Step 2: configure platformio.ini
This portal runs on Arduino Core. The minimum file for an ESP32-S3 N16R8 is:
| 1 | [env:esp32-s3-n16r8] |
| 2 | platform = espressif32 |
| 3 | board = esp32-s3-devkitc-1 |
| 4 | framework = arduino |
| 5 | monitor_speed = 115200 |
| 6 | upload_speed = 921600 |
| 7 | board_build.arduino.memory_type = qio_opi |
| 8 | build_flags = |
| 9 | -DBOARD_HAS_PSRAM |
| 10 | lib_deps = |
| 11 | bblanchon/ArduinoJson@^7.2.1 |
ArduinoJson builds the endpoint responses. WebServer and Preferences already come with the core and need no declaration.
Step 3: flash and open the monitor
Connect the board and flash it. On an ESP32-S3 with two USB ports, use the one marked UART:
| 1 | pio run -t upload |
| 2 | pio device monitor -b 115200 |
In the boot log, look for confirmation that the access point started and the server is listening on port 80.
Step 4: connect the phone
Open the phone's Wi-Fi network list. The board's network appears with the name defined in the firmware. Connect to it.
The phone will warn that this network has no internet — that is expected because the board is not connected anywhere yet. Choose to keep the connection.
Step 5: open the portal and scan
Open this address in the phone's browser:
| 1 | http://192.168.4.1 |
Tap Scan. The scan takes a few seconds, and the list shows each network with its signal in dBm and its channel. Networks below -80 dBm tend to connect and drop; prefer stronger ones.
If your network does not appear even on the second attempt, use the manual SSID field — hidden networks require it, and the field exists for that case.
Step 6: save and monitor
Choose the network, enter the password and save. The confirmation appears immediately and the page returns to the portal by itself after eight seconds.
If it connected, the panel shows the address assigned on your network. If it failed, it shows the reason — and the access point stays online so you can correct it without a cable.
Remember that ESP32 does not connect to 5 GHz networks. If yours has a 5G suffix, use the 2.4 GHz network.
Step 7: confirm from the main network
Disconnect the phone from the access point and return to your normal network. Open the address shown by the panel. If the portal responds there, provisioning is complete: the board is on your network and remains accessible.
Common errors and solutions
The network does not appear in the scan. Confirm that it is 2.4 GHz. If it is hidden, use the manual SSID. If it is far away, move the board closer and scan again — the per-channel time favors nearby networks.
I saved it and the page did not respond. This is the classic symptom of a blocking attempt. Confirm that the handler responds before testing the connection, as shown above.
It says it saved the value, but it does not connect. Check `last_wifi_error` at `/api/status`. A wrong password, WPA3-only and MAC filtering on the router produce the same symptom with different messages.
The access point disappears when the connection fails. It should not. Check that the error handler is not disabling AP mode — without it, the technician loses the way back.
I lost the credentials and want to start over. Call the configuration reset endpoint. It clears the NVS contents and returns the board to its logical factory state.